The low taper fade hairstyle has become a popular choice for those seeking a clean, stylish look that enhances any haircut. Achieving this simply requires understanding the correct techniques and tools to create a smooth gradient that blends seamlessly from the hairline to the longer top. Whether you’re a beginner or an experienced barber, mastering the art of fading ensures a polished appearance that lasts. This guide provides clear, step-by-step instructions to help you perfect your skills and maintain this timeless style with confidence.
Principales conclusiones
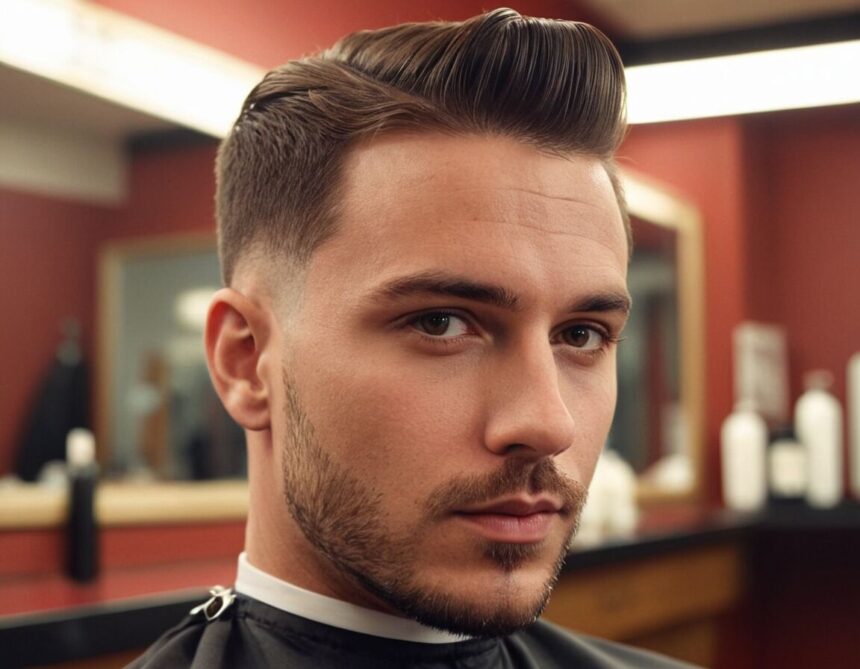
- The low taper fade creates a seamless gradient from short sides to longer top for a polished look.
- Preparation with clean, dry hair ensures precise trimming and smooth blending of the fade.
- Use clippers with appropriate guards for a steady, even gradient, avoiding harsh lines.
- Define sharp, symmetrical lines around the hairline with a razor or trimmer for a clean finish.
- Regular barber visits maintain sharpness, prevent unevenness, and extend the hairstyle’s style and freshness.
Select the right taper fade style for your hair
When choosing the right taper fade style for your hair, it is crucial to consider your natural hair texture and overall face shape. Different styles can enhance specific features or create certain visual effects, so selecting one that complements your individual look will ensure a more polished appearance. For instance, if you have thick hair, a softer blend with gradual transitions can help reduce bulkiness, while finer hair may benefit from a sharper fade that adds definition and dimension.
Your personal style and lifestyle also play significant roles in this decision. A low taper fade offers a professional and clean look suitable for formal settings, yet it can easily be versatile enough for casual or creative expressions by adjusting the length on top. Additionally, think about how much maintenance you’re willing to do; some fades require frequent visits to your barber to keep the crisp lines and smooth gradient intact. Exploring different variations of the low taper fade can help you find the perfect fit that balances aesthetics with practicality, ensuring that your hairstyle elevates your appearance effortlessly.
For further reading: Liberar el poder de las conexiones: Cómo aprovechar los consejos de los contactos para triunfar en la carrera profesional
Gather necessary tools and products for the cut

Before starting the fade, it is important to gather all necessary tools y products for a successful cut. A quality clipper set with multiple guard sizes will be fundamental for creating a smooth gradient and ensuring even trimming. Additionally, having a pair of sharp scissors or detail trimmers can help refine the edges and add texture where needed.
For shaping the hairline and defining the line-up, a fine-tooth comb and precision razor are invaluable. Make sure to also have cleaning supplies such as brushes and cape to keep hair away from the face and maintain a tidy workspace. Using high-quality products, like styling gels or pomades, not only helps in checking the shape during the cut but also aids in styling afterwards.
Organizing everything within reach before beginning will streamline the process and make it easier to work systematically. Remember that well-maintained tools, especially clippers, ensure cleaner cuts and reduce damage to the hair and scalp. Spending a little extra time gathering the right equipment pays off by resulting in a more polished and professional-looking fade.
Start with clean, dry hair for precise trimming
Starting with clean, dry hair is crucial for achieving a precise and professional-looking fade. When the hair is freshly washed and thoroughly dried, it becomes much easier to see the natural hairline and understand the current length and texture of the hair. Moist or damp hair can cause clippers and scissors to slip or snag, leading to uneven cuts or unintended results. Additionally, wet hair tends to appear longer, which might result in over-trimming if measurements are based on this appearance.
Before beginning the fading process, ensure all excess moisture has been completely removed using a towel or blow dryer set to a low heat setting. Dry hair also allows for better control while trimming because the edges remain crisp and clear. This step helps in creating an accurate baseline from which to work, making the transition between different lengths smoother and more consistent. Well-prepared hair not only aids in precise trimming but also reduces the chances of missteps that can take additional time to fix.
Overall, taking a few moments to prepare the hair appropriately will pay off by resulting in a clean, well-blended fade that maintains its sharpness through each stage of styling. It’s a simple yet effective way to improve the overall quality of the haircut and achieve a polished finish.
“The details are not the details. They make the design.” – Charles Eames
Use clippers to create a smooth gradient
When working on the fade, clippers are your most important tool. It’s crucial to select the appropriate guard size and to handle the clippers with steady, even movements. Start at the bottom of the area you want to fade and gradually move upward, maintaining a consistent angle. This helps create a seamless transition between different hair lengths, producing a smooth gradient effect. Make sure to overlap slightly as you work, blending each section into the next without creating harsh lines or abrupt changes.
During the process, frequently check your work by stepping back and examining the overall look. Use minimal pressure, allowing the blades to glide naturally through the hair, which will reduce uneven spots or chatter marks. For more control around the edges, switch to smaller guards or use the bare blade for delicate areas, such as behind the ears or along the hairline. Remember, patience and precision are key — rushing can cause inconsistencies that might be difficult to fix later. Regularly cleaning the clipper blades also ensures they stay sharp, contributing to a clean, professional finish.
| Step | Descripción |
|---|---|
| Select the right taper fade style for your hair | Consider your natural hair texture, face shape, and personal style to choose a fade that complements your look. Thicker hair may require softer blending, while finer hair can benefit from sharper fades. Think about maintenance and versatility to find the best fit. |
| Gather necessary tools and products for the cut | Assemble clippers, various guard sizes, scissors, a fine-tooth comb, precision razor, styling products, and cleaning supplies to ensure a smooth and professional fade. |
| Start with clean, dry hair for precise trimming | Wash and thoroughly dry hair to see natural hairlines and textures clearly, allowing for more accurate and clean cuts. |
| Use clippers to create a smooth gradient | Select the appropriate guard, work gradually upward, and overlap sections to blend seamlessly, ensuring a professional, even fade. |
| Define the line-up around the hairline | Use a precision razor to create crisp, clean lines around the forehead, sideburns, and neck for a sharp finish. |
| Maintain symmetry and balanced proportions | Check both sides frequently, ensuring even lengths and consistent fade progression to achieve a harmonious look. |
| Add texture with scissors or razors | Use scissors or razors to add layers and texture, creating a more dynamic and personalized hairstyle. |
| Regularly visit barber for upkeep | Schedule consistent trims to maintain sharp lines, even fade, and overall hairstyle freshness over time. |
Define the line-up around the hairline

Creating a sharp, clean line-up around the hairline is a fundamental step in achieving a polished look with your low taper fade. Using a precision razor or trimmer allows you to define these lines with accuracy. Start by carefully outlining the natural growth pattern of the hair along the forehead, temples, and neck. It’s important to work slowly and steadily to avoid any unintended cuts or uneven edges.
When shaping the hairline, pay close attention to symmetry between both sides. A balanced line enhances the overall appearance, giving the hairstyle a professional finish. If needed, use a mirror or ask for assistance to double-check the alignment. Make sure that the lines are crisp and free from stray hairs, which can dull the neatness of the style. Keep the razor or trimmer slightly angled to create a more natural yet defined outline. This technique ensures the haircut looks intentionally styled, not just cut.
In addition to clear lines, focus on maintaining smooth transitions where the hair starts to fade into the skin. Gently blending the edges prevents harsh demarcations and results in an effortless gradation. Regularly inspecting your work during the process helps you catch inconsistencies early. Proper execution of the line-up elevates the entire hairstyle, leaving it looking fresh and sharply contoured. After completing this step, a quick tidy-up of the surrounding areas will finalize the refined, structured appearance of your low taper fade.
Maintain symmetry and balanced proportions

Maintaining symmetry y balanced proportions is crucial for achieving a professional and polished appearance with a low taper fade. An evenly proportioned haircut ensures that both sides of the head complement each other, creating harmony and enhancing facial features. To accomplish this, regularly check the cut from different angles during the process, ideally in a well-lit mirror or with assistance from another person. This helps identify any asymmetries early on, so adjustments can be made before finalizing the style.
It’s beneficial to compare the lengths and contours on each side frequently rather than relying solely on memory or visual estimation. Measure and mark key points when necessary, especially around critical areas like the temples and sideburns, to ensure the length transitions are consistent throughout. When working with tools such as trimmers, use the same guard size on both sides and maintain a steady hand to prevent uneven lines.
Attention to detail plays a significant role in preserving balanced proportions. Small discrepancies might not be immediately noticeable but can significantly impact the overall aesthetic of the hairstyle. Consistent checking and fine-tuning will help create a detailed, symmetrical look that looks deliberate and well-executed. Overall, dedication to equalizing the various elements of the haircut results in a clean, structured, and harmonious style that complements the individual’s features effectively.
Add texture with scissors or razors
To enhance the overall look and add depth to your low taper fade hairstyle, texturing with scissors or razors can be highly effective. This step allows for a more dynamic and personalized appearance, creating movement and preventing the cut from looking too uniform or flat. When using scissors, focus on snipping small sections at different angles to achieve a layered effect. For razors, gentle feathering along the edges can soften transitions and introduce subtle variations that catch the light beautifully.
It’s important to approach this process with patience and precision. Start with a small amount of hair in each section, then gradually work through the style, avoiding over-texturizing which might lead to uneven results. By carefully customizing the texture, you can emphasize natural hair qualities such as curl or wave, or add contrast to straight strands. This technique also helps to blend any imperfections in the fade, producing a seamless transition between longer layers on top and shorter sides.
Regularly stepping back and examining the hairstyle from different angles will ensure consistency and balance. Keep in mind that less is often more; subtle textural adjustments are usually enough to make a noticeable difference without compromising the structure of the haircut. Incorporating this detail into your styling routine will greatly contribute to achieving an expertly finished look that fits both formal and casual settings.
Regularly visit barber for upkeep
Maintaining the sharpness y freshness of your low taper fade requires regular visits to a professional barber. Over time, natural hair growth will cause lines to blur and the fade to lose its clean appearance. Booking consistent appointments ensures that these details are kept crisp and well-defined. Frequent trims also help in keeping the hairstyle looking intentional and polished, especially if you prefer a very precise style.
A professional barber can address any uneven patches or discrepancies early on, preventing small imperfections from becoming more noticeable. This ongoing maintenance not only preserves the overall look but also reduces the effort needed for retouches at home. When scheduling regular visits, consider how fast your hair grows; typically, a visit every 2-4 weeks is ideal for maintaining optimal results. Investing in routine upkeep ultimately extends the life of your style, allowing you to enjoy a consistently sharp appearance without the hassle of correcting errors yourself.
Consistency plays a key role in upholding this style’s sophistication. Well-maintained haircuts remain sleek, balanced, and provide a great foundation for additional grooming or styling choices. Whether preparing for an important event or simply aiming for a neat everyday look, visiting a trusted barber regularly guarantees that your hairstyle always looks intentionally crafted and refined.
PREGUNTAS FRECUENTES
What face shapes suit the low taper fade best?
How often should I trim my low taper fade to keep it looking sharp?
Can I achieve a low taper fade at home or is a professional necessary?
Are there any specific hair types that are more difficult to style with a low taper fade?
What styling products work best with a low taper fade?
Source: