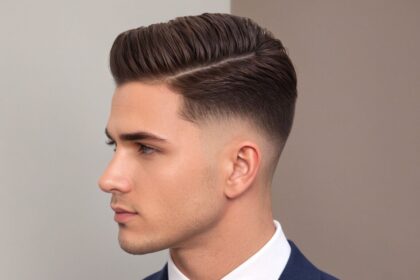
Achieving a perfect low taper haircut can enhance any style with its clean and polished appearance. To get the best results, it’s important to understand the key elements involved in shaping and blending the cut seamlessly. From selecting the right taper length to mastering precision trimming techniques, this guide provides practical advice for both beginners and those looking to refine their skills.
Kluczowe wnioski
- Choose the right taper length based on your face shape for a balanced look.
- Proper washing and drying are essential for precise and smooth trimming results.
- Use high-quality clippers and guards to ensure clean lines and seamless blending.
- Start tapering from the desired length, working systematically downward for a perfect transition.
- Regularly check symmetry and finalize with detailed edging for a sharp, professional finish.
Choose the right taper length for your face shape
Choosing the appropriate taper length is crucial for creating a balanced and harmonious look that complements the natural features of the face. When selecting the length, it’s important to consider the overall shape of the face, whether it is round, oval, square, or heart-shaped. For instance, individuals with arounder faces tend to benefit from a slightly longer taper that adds some verticality and elongates the appearance. Conversely, those with a square face might prefer a shorter taper to soften the jawline while maintaining a neat silhouette.
The goal is to ensure that the taper gradually changes in length, aligning with the facial contours to enhance proportions naturally. A more gradual taper often works well for those seeking a subtle transition, providing a professional finish without drawing excessive attention to the sides. On the other hand, a sharper taper can add definition and structure, particularly if the hair on top is styled voluminously. It’s beneficial to visualize how different lengths will interact with personal style and facial features before starting the trim. This mindful approach leads to a tailored result that highlights individual characteristics rather than overshadowing them.
Więcej informacji: Taylor Swift i Travis Kelce: Spojrzenie na ich głośny związek
Prepare your hair with proper washing and drying
Before beginning the tapering process, it is crucial to thoroughly wash the hair to remove any dirt, oil, and product buildup. Clean hair ensures that the clippers can glide smoothly over the scalp, resulting in a more precise and even cut. Use a gentle shampoo suited to your hair type and rinse thoroughly to eliminate residue that could interfere with trimming accuracy.
Once the hair is clean, proper drying is equally important. Wet or damp hair can be difficult to work with; it may cause the clippers to snag or pull, leading to uneven results. Gently towel-dry the hair until it’s just about dry, then use a blow dryer on a medium setting if needed. Drying helps reveal the natural shape of the head and hair, making it easier to see areas that need adjustment. Additionally, well-dried hair reduces the risk of slipping during trimming, encouraging better control and cleaner lines.
Taking the time to prepare the hair in this way creates a stable foundation for achieving a sharp, polished low taper. It not only enhances precision but also contributes to the overall health and appearance of the hair, ensuring a professional look with minimal effort.
Use high-quality clippers and guards for precision
High-quality clippers and guards are fundamental tools when aiming for a precise and professional-looking low taper haircut. Investing in reliable equipment ensures that the trimming process results in clean, consistent lines and smooth blends between different lengths. Cheaper or worn-out clippers can snag hair, cause uneven cuts, and make it difficult to achieve the sharpness needed for an optimal finish.
Using proper guards allows for accurate control over the length of the hair being cut. They come in various sizes, providing flexibility to create seamless transitions from shorter to longer sections. Selecting the right guard size at each stage helps maintain uniformity and avoids accidental over-trimming. It’s important to select guards made from durable materials that won’t slip or degrade quickly with repeated use.
Consistently maintaining your clippers—such as regularly cleaning and oiling the blades—ensures peak performance throughout every trim. Well-maintained tools contribute to better precision, reduce static, and prevent pulling or irritating the scalp. Overall, high-quality clippers and guards serve as the foundation for achieving a controlled and refined low taper style, making the entire grooming process smoother and more predictable.
Precision is the key to excellence in every detail. – Leonardo da Vinci
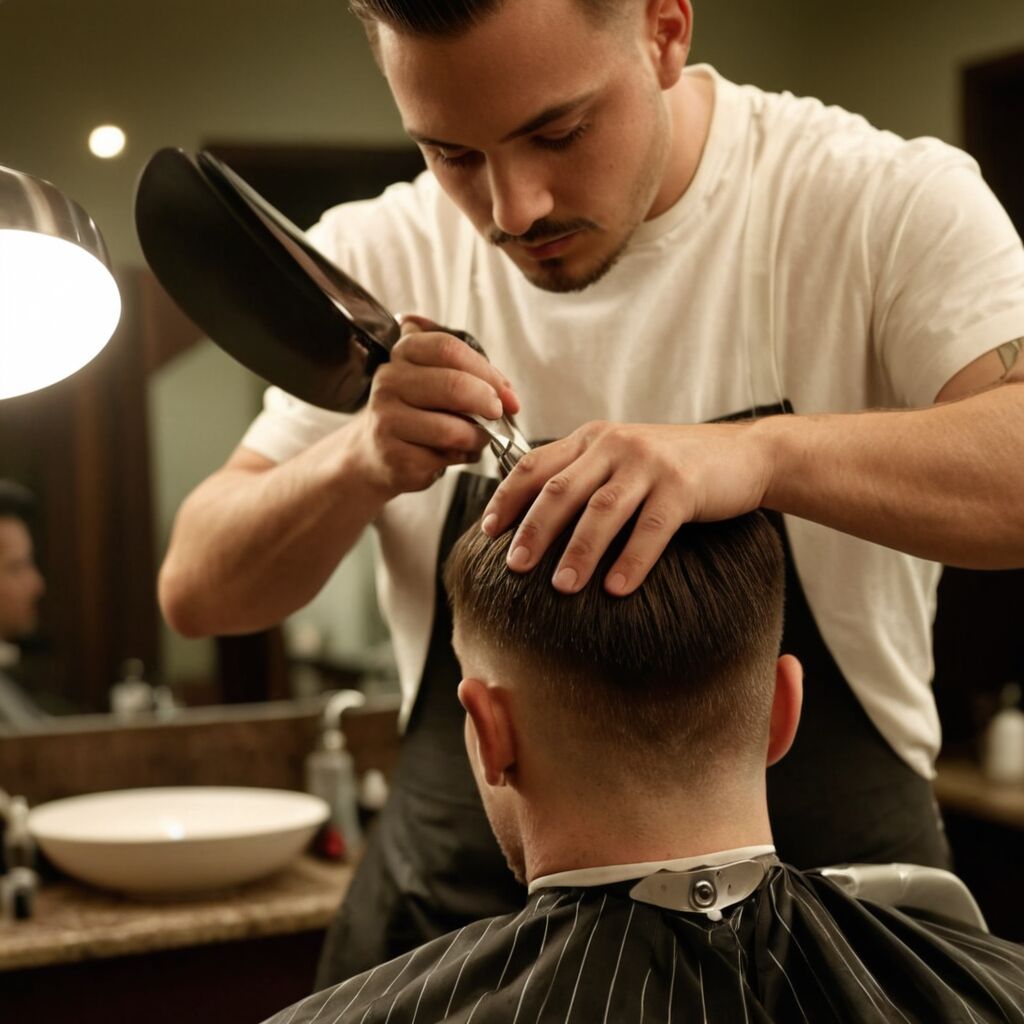
Start tapering from the desired length downwards
Once you have prepared the hair and chosen the appropriate tools, it is important to begin tapering from the desired length, working systematically downward. Starting at the top of the side or back section where the length is more manageable allows for greater control over the transition. Use your clipper with a guard that matches your initial target length, and carefully run it through the hair in even, consistent motions. This foundational step sets the stage for a smooth blend without abrupt changes.
As you move downwards, gradually decrease the guard size if you want a shorter taper, ensuring you maintain a steady hand and precise motion throughout the process. It’s beneficial to regularly check your progress in a mirror, keeping an eye on how the taper aligns with the overall shape. Avoid rushing this phase, as uneven lines or inconsistent lengths can be difficult to correct later. Taking small, deliberate steps helps achieve a clean, professional finish.
This approach provides a controlled starting point for blending into the longer hair on top. Keep in mind that maintaining a consistent technique and paying close attention to speed and pressure will result in a seamless transition. Ultimately, starting from the desired length and working downward ensures precision and contributes significantly to the polished appearance of the low taper haircut.
Additional reading material: The Rise of the Wolf Cut: Modna fryzura, która odmienia nowoczesny wygląd
| Key Aspect | Szczegóły |
|---|---|
| Choose the right taper length for your face shape | Select a length that complements your facial features, considering face shape for a balanced look. |
| Prepare your hair with proper washing and drying | Wash thoroughly and dry hair well to ensure precision and a smooth trimming process. |
| Use high-quality clippers and guards for precision | Invest in good equipment to achieve clean lines and consistent blends. |
| Start tapering from the desired length downwards | Begin at the top section and work systematically downward for a seamless transition. |
| Blend the sides smoothly into the top hair | Ensure a gradual transition between sides and top to achieve a polished look. |
| Regularly check symmetry and alignment during trimming | Use mirrors and frequent visual checks to maintain evenness and balance. |
| Finish with detailing for a clean, sharp look | Use detailing tools for edging and sharp lines to enhance overall appearance. |
| Maintain your haircut with regular trims | Schedule trims periodically to keep the style fresh and well-defined. |
Blend the sides smoothly into the top hair
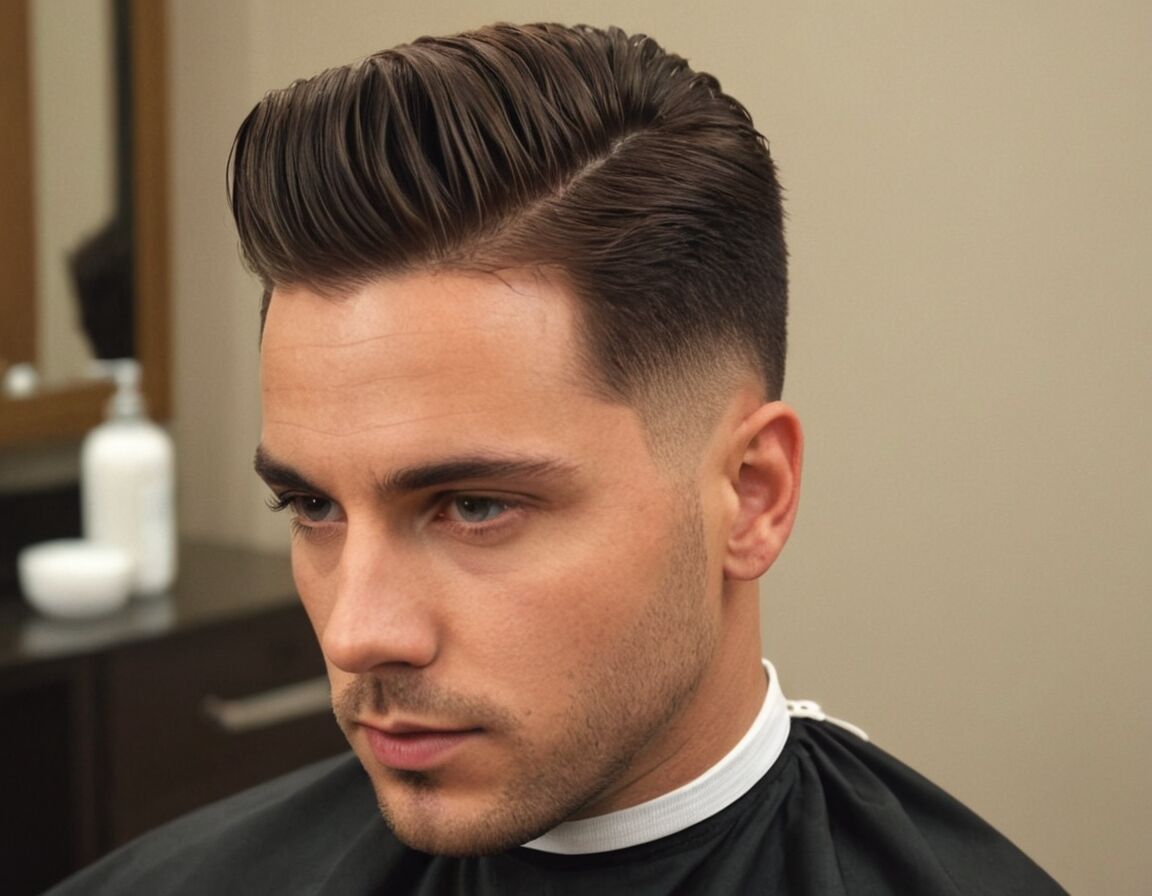
Achieving a seamless transition between the sides and the top of the hair is a key element in creating a polished low taper look. To accomplish this, it is important to work slowly and carefully, ensuring that the blend appears natural rather than abrupt. Start by using your clipper with a guard slightly longer than the shortest length on the sides, and gradually move upward toward the longer hair on top. This technique helps to avoid harsh lines and creates a smoother gradient.
Consistent motion is crucial during this process; keep the clipper moving steadily in light, overlapping strokes to prevent uneven areas. Moving in small sections and frequently checking your work in a mirror helps maintain control and precision. Remember, the goal is to create a gentle graduation so that no distinct separation is visible between the tapered sides and the crown of the head. If necessary, use a blending tool or an edger for finer details, especially around the ears and neckline.
Patience plays a major role when refining the blend. Take your time, making adjustments as needed, to ensure a harmonious transition that complements your face shape and overall style. A well-blended haircut enhances the appearance of symmetry and adds a professional touch that elevates the entire look. The result will be a sleek, unified finish that highlights clean, precise craftsmanship, transforming a basic haircut into a refined hairstyle.
Przydatne linki: Ewolucja Goku: Jak kultowy bohater Dragon Ball na nowo zdefiniował kulturę anime
Regularly check symmetry and alignment during trimming

Throughout the trimming process, it is vital to consistently check the symmetry and alignment of the haircut. This practice helps ensure that both sides are evenly shaped, preventing an unbalanced appearance once finished. Using a mirror in combination with your main view allows for multiple vantage points, making discrepancies easier to spot and correct promptly.
Pay close attention to the natural contours of the head, as small differences can become noticeable after completion. When working on one side, periodically compare it to the other by cross-checking angles and lengths. If necessary, make minor adjustments immediately rather than waiting until the end, which reduces the chance of uneven lines or asymmetries lingering. Remember, tools like a comb and mirror are invaluable for this step, as they help you assess subtleties more effectively.
Regularly verifying your work not only directs you toward a balanced look but also contributes to a cleaner overall finish. It encourages precision at every stage, resulting in a harmonious style that flatters the face shape and enhances your grooming routine. Maintaining vigilance during each pass guarantees a professional result, where imperfections are caught early and corrected seamlessly.
Finish with detailing for a clean, sharp look
To achieve a clean, sharp look, it is crucial to focus on the finer details at the end of the haircut process. This step enhances the overall appearance by creating crisp lines and well-defined edges that frame the style beautifully. Grabbing a precision trimmer or an edger allows for meticulous work around areas such as the neckline, sideburns, and hairline, where even slight imperfections can be noticeable.
Take your time when working on these sections; slowly etch out clean curves or straight lines with controlled, steady movements. It’s helpful to use small strokes rather than long, sweeping motions to maintain accuracy. Pay close attention to symmetry on both sides, constantly comparing and adjusting to ensure the final result appears balanced and cohesive.
Finishing with detailing also involves refining any uneven spots, stray hairs, or rough edges. Use a small brush or damp towel to wipe away loose cut hairs for a clearer view of the finished design. The effort invested in these delicate touches will make the hairstyle look professionally done and enhance its visual impact. When complete, the result not only looks polished but exudes a sense of order and sophistication, making the entire grooming appear intentional and well-executed.
Maintain your haircut with regular trims
Maintaining your haircut with zwykłe wykończenia is key to preserving its shape and sharpness over time. As hair naturally grows, the clean lines and smooth taper can fade, leading to a less polished appearance. Scheduling visits to the barber or stylist every few weeks helps keep the low taper looking fresh and well-defined.
Consistent trimming not only extends the lifespan of your style but also contributes to healthier hair. Cutting away split ends and damaged strands encourages growth and prevents breakage, which can affect the overall look of the haircut. When you stick to a regular trim schedule, your hair remains easier to manage, and the style stays consistent from one session to the next.
It’s helpful to communicate with your stylist about your preferred maintenance interval, especially if your hairstyle involves precise detailing or fades. This routine ensures that your haircut continually complements your face shape and personal style without requiring major adjustments each time. Over time, this effort makes styling quicker and more straightforward, saving you both time and effort during daily grooming routines. Ultimately, consistent trims help uphold a sharp, neat appearance and keep your hairstyle looking well-kept year-round.
FAQ: Odpowiedzi na pytania
What are the best hair products to use after a low taper haircut?
Can I cut a low taper hairstyle at home, or should I see a professional?
How often should I wash my hair after getting a low taper cut?
Are there any specific styles or haircuts that pair well with a low taper?
What are some common mistakes to avoid when cutting or styling a low taper haircut?
Przydatne linki: